Running WordPress on your PC enables you to learn how to build websites, configure them, back up and explore this popular CMS. Here’s the easy way using VirtualBox and it’s free.
Many people start that blog or website using a free service like wordpress.com or blogger.com. These are great if all you want to do is post a few articles with the minimum of effort.
However, people often outgrow them after a time. There are limitations with these free services that prevent you from growing your site and adding extra features and functions.
For example, you might want to sell items, add affiliates, display advertising and so on. These are not possible or are very limited on free websites.
If you want to remove the limits and restrictions and free your creativity, then self-hosted WordPress is the best solution. Choose a web hosting company and sign up.
You can set up WordPress very easily and most web hosts have a simple setup procedure. They know many website owners are not technical, so they have simplified the setup. Here’s how easy it is to set up WordPress.
However, switching to WordPress is still a frightening prospect for some people. They aren’t sure what they are doing or how to use WordPress, or they worry they might do something and break it.
Wouldn’t it be useful to have a private copy of WordPress on your PC to play around with? You can run it, explore it, try all the features, get to know it, and customise it.
This is valuable experience that will help enormously when running a real WordPress website that is publicly available.
Another use for WordPress on your PC is that you can mirror your real site, or try new plugins and get to know them before installing them on your real site. Your private WordPress running on your PC is your test setup.
There are a few different ways to run WordPress on a PC, but one of the simplest has to be using VirtualBox.
VirtualBox is a free program that enables you to run operating systems in a window on the desktop. You can think of it as like running a PC simulator into which you can install whatever software you want.
So VirtualBox runs operating systems and Bitnami supplies operating systems with website software preinstalled. They are made for each other.
Running a Bitnami virtual machine containing WordPress in VirtualBox on your PC is like having your own copy of WordPress.
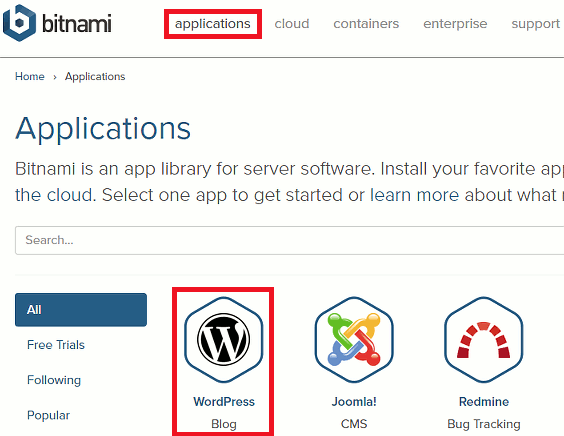
1 Explore Bitnami applications
Go to the Bitnami website and click Applications in the menu at the top. There is a huge choice of applications, but the one we want is WordPress Blog. It is very popular and so it is usually the first item in the list. Click it.
2 View the WordPress options
On the WordPress page at the top is a menu bar with Virtual Machines. Click it. We need a virtual machine to run in VirtualBox.

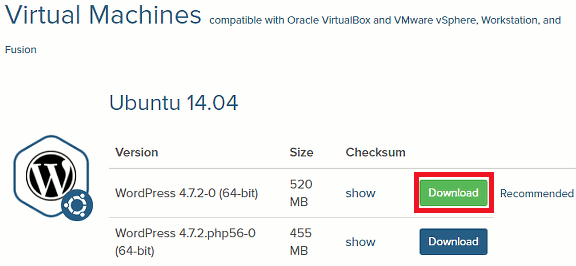
3 Download WordPress
On the next page is one or more versions of WordPress. Usually the recommended one is the one to choose. This is a 520MB download. It is not because WordPress is 520MB, most of that is the operating system. You get a bare bones Linux system that runs inside VirtualBox.
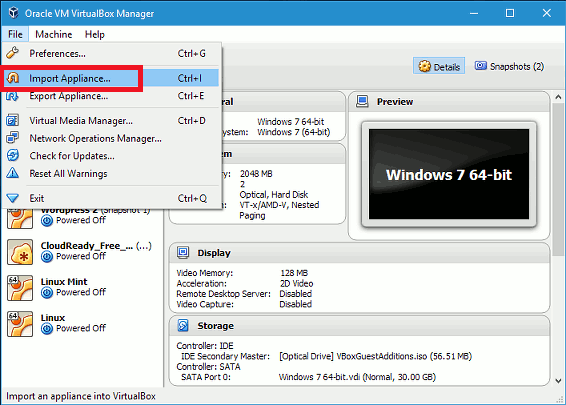
4 Import into VirtualBox
If you do not have it, download and install a free copy of VirtualBox and the extensions. There are many articles here about VirtualBox, such as Top Tips to speed up VirtualBox, Speed up VirtualBox enormously with this tweak, The BIOS tweak you need to speed up VirtualBox. It is easy to install and get running.
Go to the File menu in VirtualBox and select Import Appliance.
5 Select WordPress
Click the little folder icon at the right side of the window and select the WordPress file that was downloaded from the Bitnami website. Click Import at the bottom.

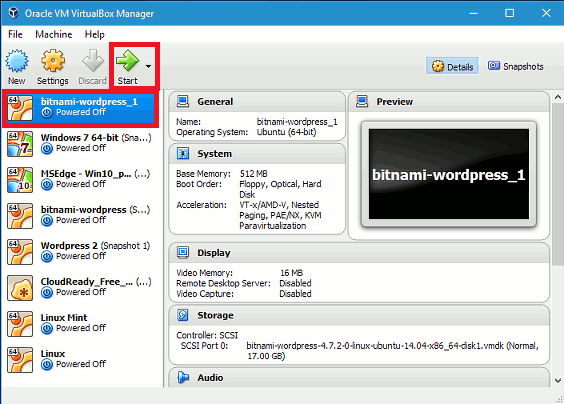
6 Start WordPress
Select the Bitnami WordPress virtual machine you just imported and click Start in the toolbar. (You can see I run lots of different virtual machines for testing stuff, it’s a brilliant program.)
7 Get the login details
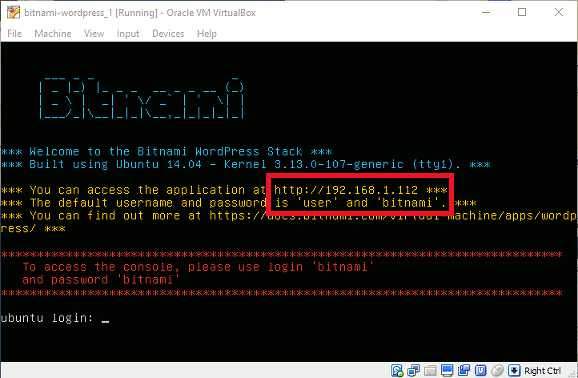
A window like this appears on the desktop and WordPress is now up and running. On the screen is some information and there are two things you should look at. One is the IP address. Type into a browser.
In my case it is http://192.168.1.112 but your PC may use different numbers. Only people on your network can access this and people on the internet cannot see it.
The other thing you should look it is the username and password. This is set to ‘user’ and ‘bitnami’. Remember that.
8 Access your WordPress site
Open a web browser and enter the IP address. Mine is 192.168.1.112, yours is different. The website home page will appear and it has some sample content - just a page and a post. Scroll down to see it all.
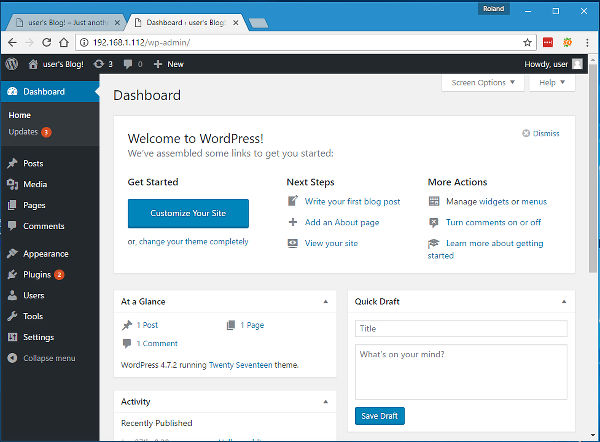
To log into the admin interface of WordPress the standard method is to go to 192.168.1.112/wp-admin (use your own IP address, not mine!) or scroll down and click the Log in link on the page 192.168.1.112/wp-login.php (use your own!)
The username is ‘user’ and the password is ‘bitnami’.

9 Explore the admin interface
You are now in the admin interface, the back end of WordPress, which is where you customise it, create blog posts and pages, and more.
If you aren’t sure what to do, there are some courses to help you get started with WordPress. The Beginner’s guide to WordPress teaches you the basics and then there is a follow-up course that take you a step further with self-hosted WordPress.
Don’t be afraid to experiment. If you break WordPress, just delete the Bitnami virtual machine and import it again for a fresh start (step 4).
If you are familiar with VirtualBox, you can create a snapshot, which is like a backup. You can restore a snapshot and everything is put back as it was. Deleting it and and importing it again works though.
This was so much faster & easier than downloading a linux .iso and installing it in a VM and manually installing & configuring all the webserver components and finally doing that for WordPress. I needed a quick WordPress install to test plugins before going on our live website. This made it so much faster & painless than ever. Thank you!
Thanks! Even a n00b like me was able to get a WP test site up in running.