Many video screensavers and wallpapers are available in macOS Sonoma. However, if you download them all, they’ll use 45 GB of disk space. How do you manage them? How do you recover the space?
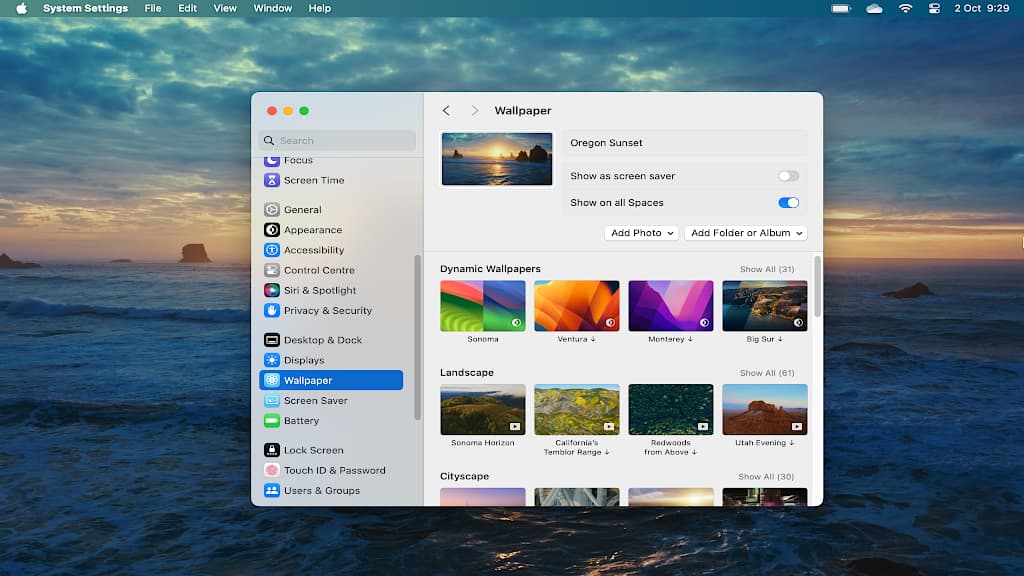
If you have macOS Sonoma, you have probably already discovered the new Wallpaper section in the System Settings app. In addition to usual great collection of static images, there are also animated video wallpapers, sometimes called live wallpapers.
Click one of these video wallpapers and after few seconds later a static image appears on the desktop. To actually see it animated, click the Apple logo in the menu bar and select Lock Screen. The video plays when the Mac is locked. Log in and the current video frame is seamlessly used as the desktop wallpaper, which is quite clever.
There is also a switch at the top of the Wallpaper section in System Settings to also set the video as the screen saver.
These video or live wallpapers are fascinating to explore and clicking one downloads it and makes it the current wallpaper for the desktop and lock screen. However, there are some important things you need to know about them.
Related: How to access advanced features in Safari using flags
Video wallpapers are big!
There were 134 video wallpapers available last time I counted (more may be added with macOS updates). I have not tried them all, but I looked at several and the file sizes were between 270 and 470 MB. Whenever you look at or use a wallpaper, it is downloaded and saved to disk.
You can tell the video wallpapers because there is play button on them, which static wallpaper images don’t have. If they are online, not on the Mac and therefore not using any disk space, there is a small down arrow to the right to their name.
Any video wallpaper you select is downloaded and the down arrow is removed. This makes it easy to see which wallpapers are on your Mac and which are online.
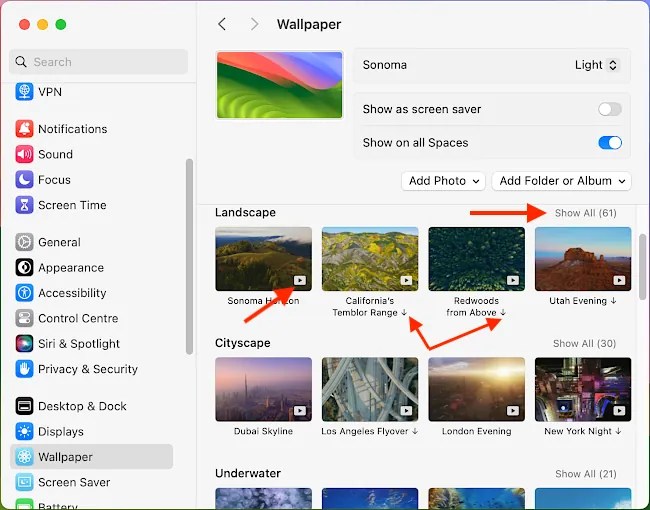
If you were to look at all the wallpapers in System Settings > Wallpaper, I estimate it would use around 40 to 50 GB of disk space. That is a big chunk of your storage if you only have a 256 GB drive in your Mac, which a lot of base model Macs have. Bear this in mind as you are trying the video wallpapers. You can use up a lot of disk space.
If you look at a video wallpaper, it is downloaded. If you decide not to use it, how do you delete the downloaded video and recover the disk space? If there is a way to do this in the System Settings app it is not obvious and I could not find a way to do it. This could change in a future Sonoma update, but right now, you can’t.
Where are video wallpapers stored?
The only way to remove video wallpapers that you do not use and free up the disk space is to use Finder to find them on the disk and delete them. Go to:
/Library/Application Support/com.apple.idleassetsd/Customer
This is where wallpapers you have downloaded are stored. Open the 4KSDR240FPS folder and you will see a .mov video file for each video wallpaper you have viewed. Select one of these .mov files in Finder and press the spacebar to preview it with Quick Look.
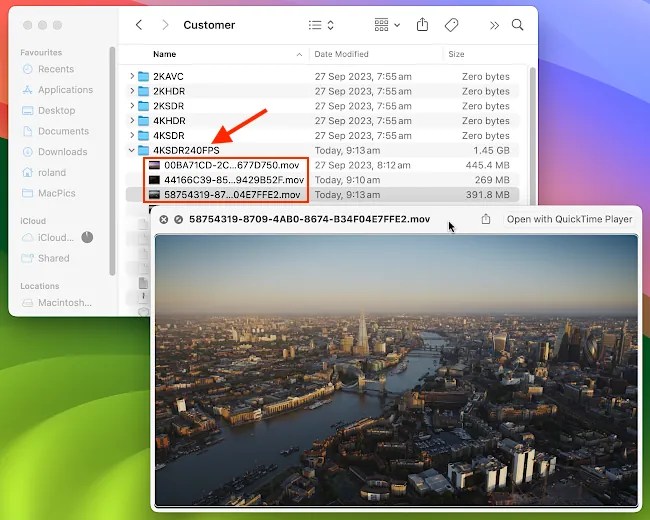
The video wallpapers are regular .mov movie files stored on the disk and they can be deleted in Finder in the usual way. Do not delete the current active video wallpaper, because that might confuse macOS. The other .mov files in this folder can be deleted. They are moved to the Bin, so also empty the Bin to recover the disk space they are using.
Deleting a video wallpaper is not immediately reflected in System Settings, but if you restart the Mac and return to System Settings > Wallpaper, the download arrow appears next to the video wallpapers you deleted. If you ever want it again, it can be downloaded.
I don’t know why Apple has not included an easy way to remove video wallpaper downloads. Perhaps an update will add the feature.
