Microsoft Paint in Windows 11 has had some powerful updates recently, including an AI background eraser and layers. Here is how to use these great new features. It’s not Photoshop, but it’s useful.
There are people that never use Windows Paint, but there are others that use it almost daily. Like Windows Notepad, it is a primitive app with few features, but somehow it manages to be very useful and even indispensable for many people.
Well, you can no longer call it a primitive app with few features because it now has some very advanced features. Among them is a background removal tool. You can load an image, remove the background and then save it.
Images with transparent backgrounds are often used on web pages, and this makes Paint a useful tool for preparing web images. However, I expect most people to combine the new background removal tool with another great feature Paint has gained, multiple layers.
Building an image using layers is such an essential feature for many people that it is hard to imagine creating useful artwork without it. You can stack layer upon layer and create a unique image.
Here I show how to do this in Microsoft Paint and it is something that not long ago was impossible in the app and would have required third-party software. Now you just need Windows.
I am using Windows 11 with the 23H2 update for this. The new Paint features may or may not come to older versions.
Related: How to copy text from images with Snipping Tool in Windows
Paint Background removal tool
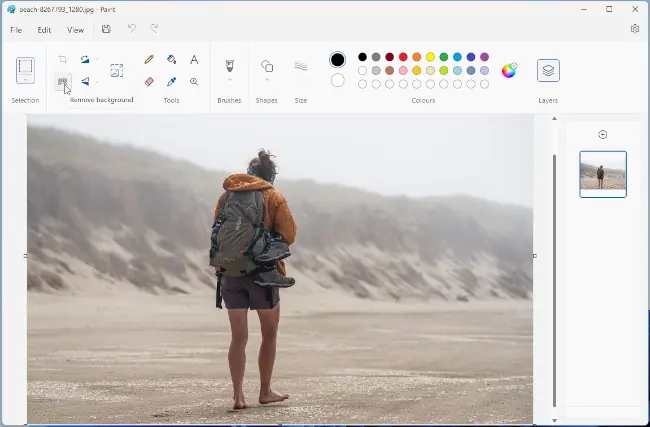
Find Paint on the Start menu or press Windows+R and type mspaint to open it. Load a photo that you want to remove the background from. I am using a picture of someone walking on the beach, but it does not have to be people, and your dog, cat, and other things can be used.
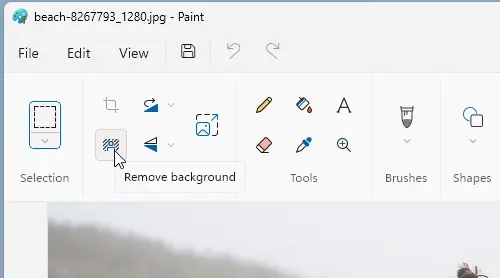
Find the Remove backgound icon in the toolbar and click it. You don’t need to tell Paint what background is or what the subject is, and it can work it out on its own. Presumably there is some AI going on behind the scenes, because it seems to know what you want.
Cut out the subject
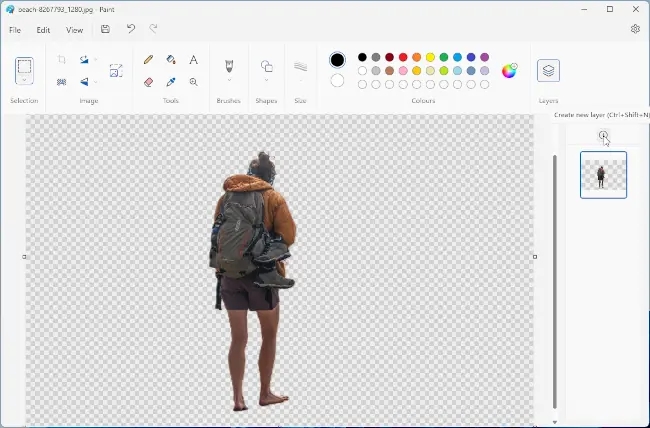
The result is instantly shown and here you can see that it removed everything but the person. You could save this image to disk or copy it to the clipboard to paste elsewhere, but let’s continue in Paint.
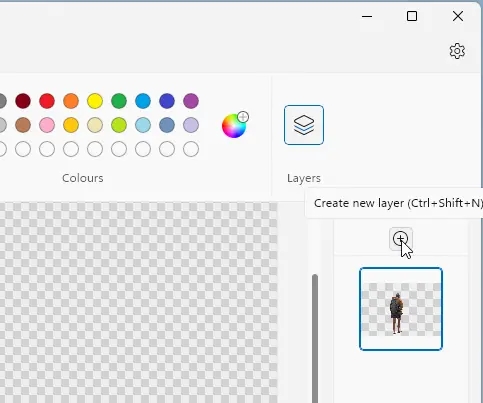
On the right of the image is a vertical layers panel. Click the Layers button if you don’t see it. The subject is on a layer and there is a plus button that adds another layer. Click it and we will create a new layer for a new background.
Import to a layer in Paint
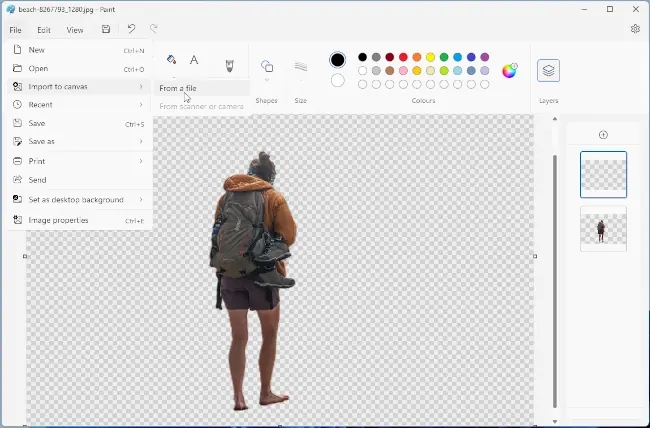
Go to the File menu, hover over Import to canvas and click From a file. (You can also import from a scanner or camera.)
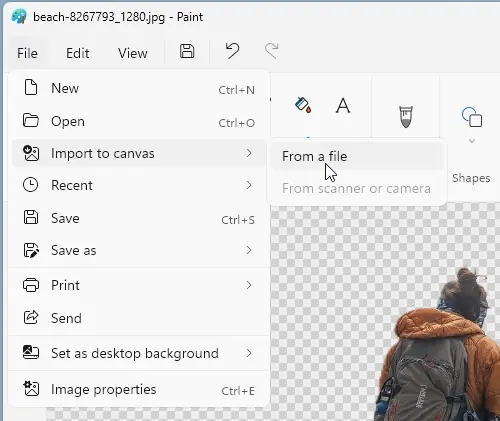
This is used to load a new image into the layer. If you use File > Open, the whole image is replaced, but if you use Import to canvas the image is imported to the current layer.
Re-order Paint layers

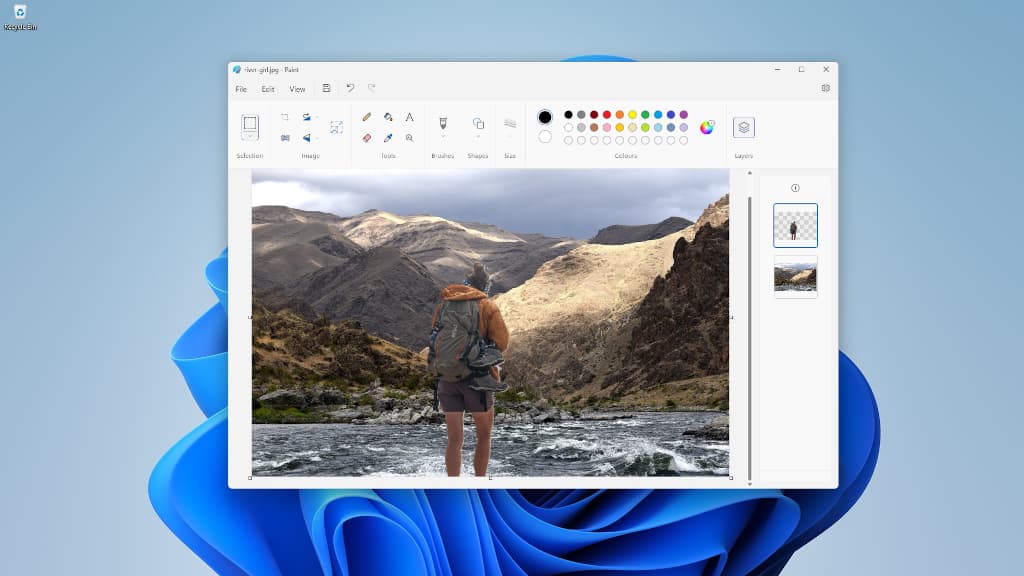
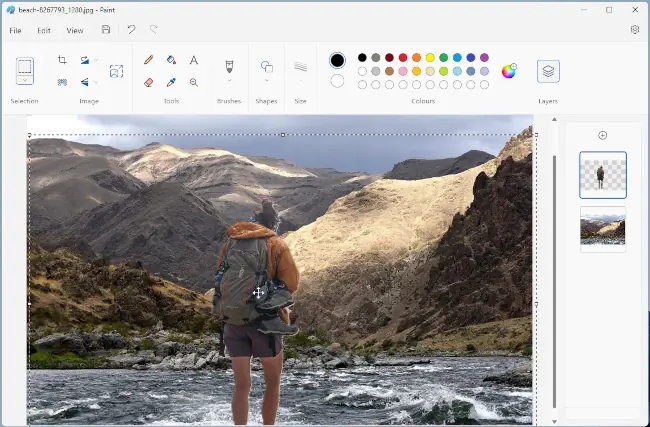
I selected a landscape photo on disk and it looks like it has replaced the image of the person. However, this is simply because the landscape image is on top of it. We need to change the order of the layers.
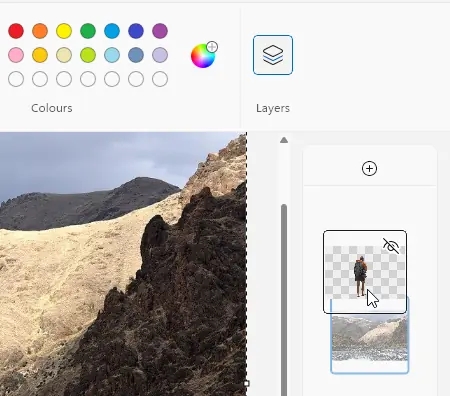
Go to the layers panel on the right and click and drag layers to re-order them. I will bring the layer with the person to the top.
Position the layer
Now the image is looking good and there are two layers. If the layers are not positioned as you want, select the layer, press Ctrl+A to select all, then click and drag it to position it. I needed to drag the person down a little so they didn’t look like they were floating on top of the water.
All the other Paint tools can be used on a layer, so you can paint, crop, and perform other actions. When you are happy with the image, save it to disk.
These new features in Paint are very useful. A bit like the way Notepad is useful when you don’t want to load Word and all it’s baggage, Paint is useful when you don’t need to load a huge photo editor like Photoshop.

Leave a Reply