
Did you know that background removal is baked into the latest version of macOS on the Apple Mac? Select a photo in Finder and there is an option to remove the background. Here’s how it works.
There are several reasons why you might want to remove the backgrounds from photos, and one is to avoid distractions, such as when photographing products for sale. Another reason is so that the background of a photo can be replaced with a different one. Two or more photos can be combined using layers in a photo editing app to produce a unique picture.
Background removal is built into the latest version of macOS, and it can be accessed in more than one way. For example, it can be used in the Preview app and also from Finder.
I have to say that the implementation in Preview is poor and I do not recommend using it. It is much better in Finder. Let’s see why.
Related: How good are your photos? Get an AI report in Apple Photos
Remove photo backgrounds in Preview
It could not be easier to remove the background from a photo in Preview. Just open a photo in the app, go to the Tools menu and select Remove Background. What comes next is plain wrong though.
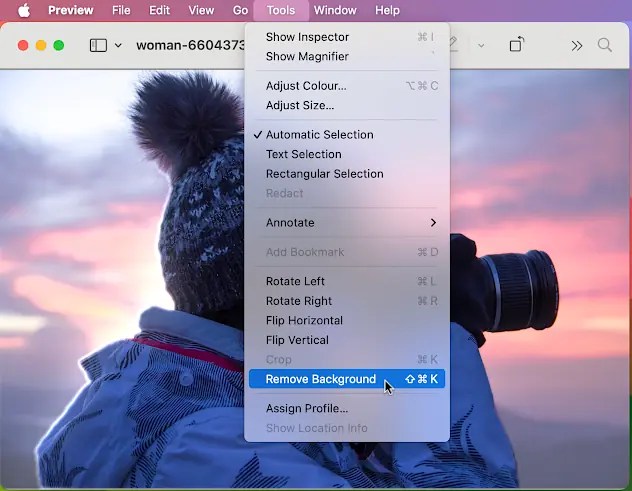
Photos are usually stored as JPG images, but the JPG file format does not support transparency. To get around this, when the background is removed, the image is converted to a PNG file, because this supports multiple layers and transparency.
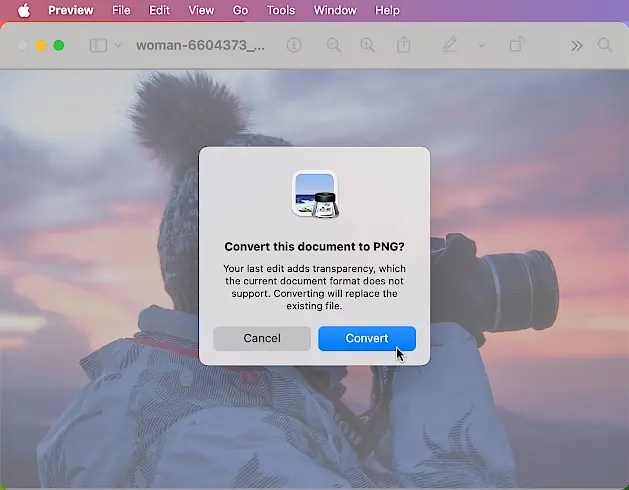
Here is the problem. Preview deletes the original JPG image and saves the modified image with the background removed as a PNG. Let me say that again, the original image is deleted! If you ever want to do anything with that image again, you can’t, it is gone. It is not even in the Bin.
If you intend to use background removal in Preview, make a copy on the disk first and open the copy. It does warn you that the original is lost, but even so, no photo editor should destroy the original like this.
Remove photo backgrounds in Finder
You don’t even need to open photos in the Preview app to remove the background, and it can be done more easily in Finder. Ctrl+click an image file like a photo JPG in a Finder window and then select Quick Actions > Remove Background from the menu that is displayed.

Unlike Preview, Finder creates a copy of the image and saves it as a PNG file with Background Removed added to the filename.
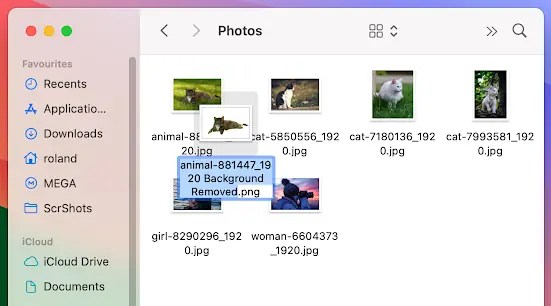
This is exactly what is needed and you now have both the untouched original photo and a copy of it with the background removed.
Before removing the background
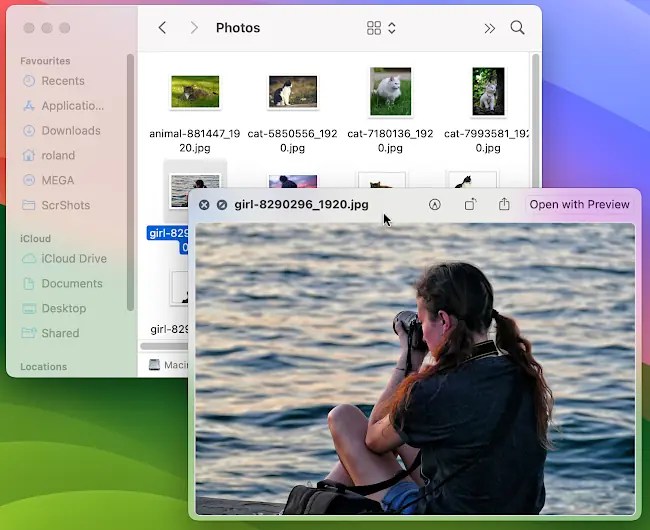
Here is a photo before removing the background. To preview photos, select the file in a Finder window and press the spacebar.
After removing the background

Here is the photo after removing the background in Finder, which saves the image with a new name, preserving the original photo. The background looks colored because the Quick Look window is semi-transparent, and the Finder window and desktop show through.
Replacing the background
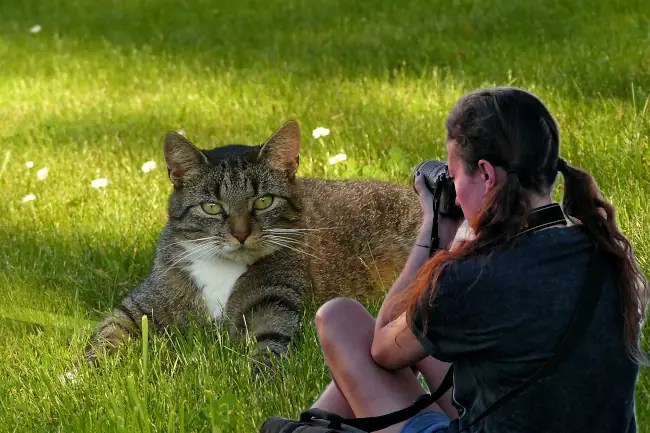
A cat photo was loaded into GIMP photo editor, then the photographer with background removed was dragged from Finder and dropped on the image. The result was saved from GIMP. The whole process took hardly any time or effort at all.
Although you can use a photo editor’s built-in tools to remove the background from photos or to cut out the subject, I could not have done a better job than Finder by manually using selection tools. I certainly could not have done it in the five seconds it took using Finder.
This is a great feature for the Mac, but be careful not to delete your original photos when using Preview. Use Finder instead.
