
Create a group of people on your Apple Mac and share passwords with them. It is useful for work teams accessing shared resources or simply for your family. Choose which passwords to share.
Most passwords should be kept private because they are used to access things like online shopping and banking, access to websites and services, and so on. However, you might want to share certain passwords with other people. For example, you might want to share your home Wi-Fi password with all your family, or share a password to a photo album, media server or other home device. At work, you might want to share one or more passwords with your team, like access to shared resources everyone needs.
You can tell people that are physically present, or you can message them using a secure messaging service if they are not around. However, it can be awkward if you change the password. It is tedious telling everyone, some people may not be around and find they cannot access something they need, and so on.
Create a password group, add people to it, add the passwords everyone needs to know, and it is automatically kept in sync, and everyone is automatically up to date. Even if you only need to share a small number of passwords with a few key people, it is still worth doing.
Let’s see how to set up a password sharing group. I will use a Mac running the latest version of macOS for this. Passwords are synced through iCloud and are available on the iPhone and iPad. The screen is different, but the features and options are the same and you can set up password sharing groups on iOS and iPadOS using the same method I use here on a Mac.
Create a shared passwords group
On the Mac (or iPhone or iPad), open the Settings app and then open the Passwords section. Click (or tap) the plus button and select New Shared Group from the menu that is displayed.
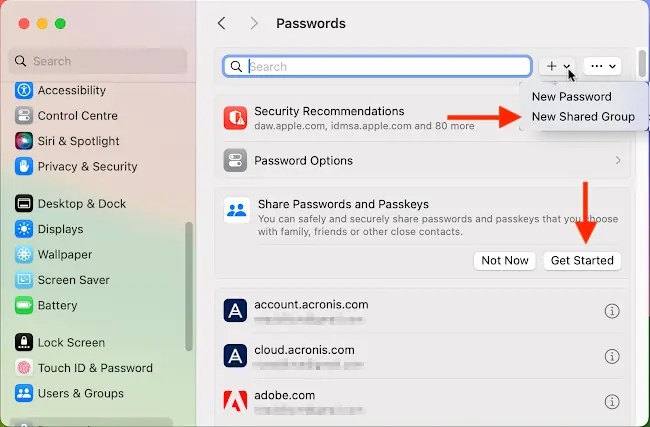
If you have never created a shared group for passwords, you will see a Share Passwords and Passkeys section with a Get Started button. It does the same thing.
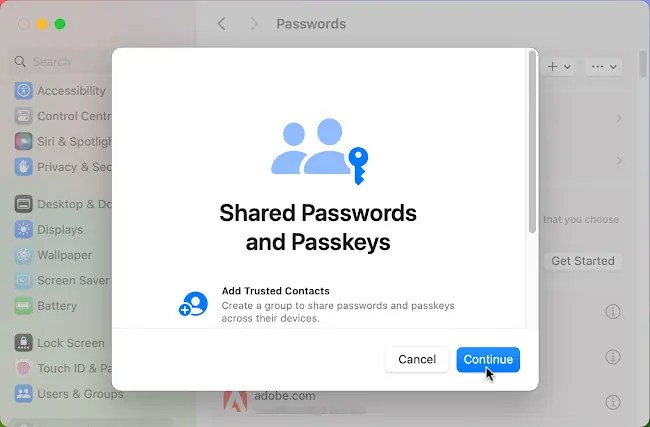
A window appears containing information about shared passwords and passkeys. Click the Continue button to proceed.
Configure a shared passwords group
A form is displayed, and at the top you can name the group. Multiple shared groups are possible, and you can name them after your family, work team or department, and so on. I only have one and I called mine SharedPass, but call yours whatever you like.
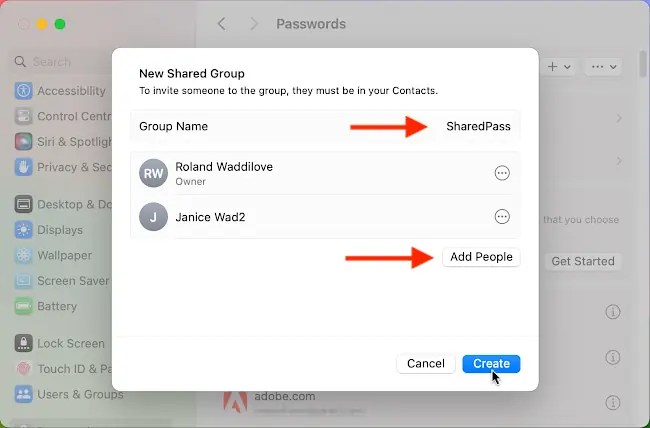
Initially, you will be the only member of the shared group and it will say Owner below your name. Click the Add People button to add members. You can add email addresses or select people in your contacts. The three dots button at the right of each group member enables you to manage them. Click it if you want to remove a member from the group.
After adding people to the shared group, click the Create button.

There are a couple of warnings that might appear when you create a shared group. One is about devices and there will be two lists of Macs, iPhones and iPads showing which are compatible and which are not. Old devices running old versions of macOS, iOS or iPadOS are not compatible.
Add passwords to the shared group
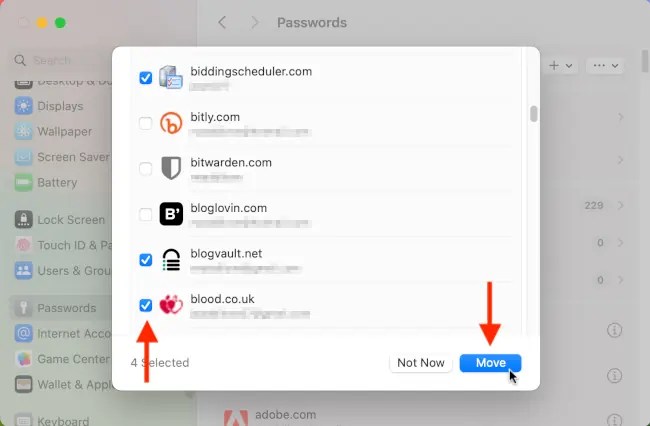
Your logins are displayed and checkboxes next to them enable you to select the ones you want to move to the shared group. Passwords only appear in one place, so they are moved rather than copied. This does not affect how you use them. It is just how they are organized.
Another warning message that might appear at some point during setting up a password sharing group concerns reused passwords. People often use the same password for several services, so if you share a password that is reused elsewhere, the people in the group could then access whatever website, service or resource it is reused with. Don’t share reused passwords because you are sharing more than you realize. Make each shared password unique.
Notify members
Now that the shared group is set up, and people and passwords have been added, you need to notify members that they are now part of it.

You are prompted to send invitations to the group members using Messages. Just click the button, Notify via Messages. When a member receives the message, they just click it in the Messages app and they are given an option to accept or decline the invitation.
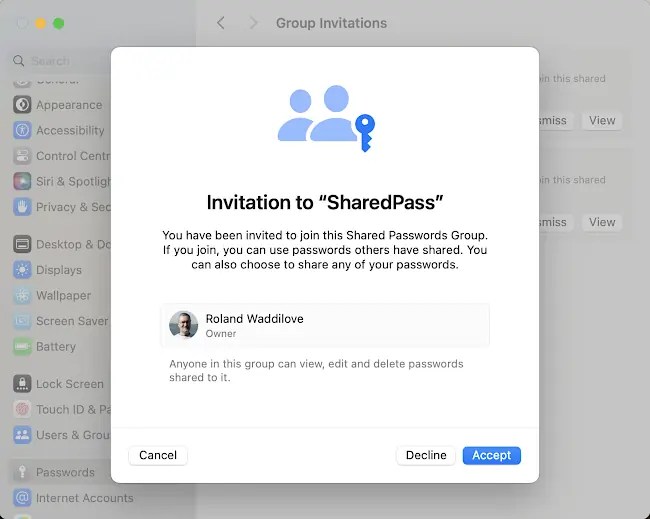
If the people you ivite accept, the shared passwords the group contains can be viewed and used just like any other password they stored.
Your shared passwords group
Settings > Passwords on the Mac (iPhone and iPad) now looks different and there are sections for My Passwords and shared passwords. Shared password groups are listed by name.
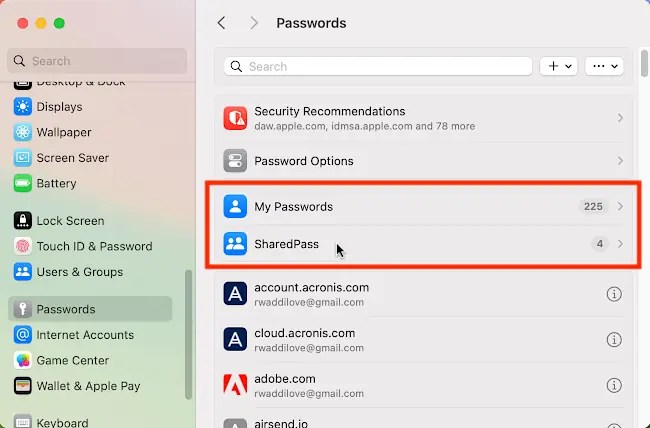
It makes no difference where a password is stored when it is used, but if you want to see which passwords are private, which are shared and which people, you can see here. Just click the groups to see the members and passwords.
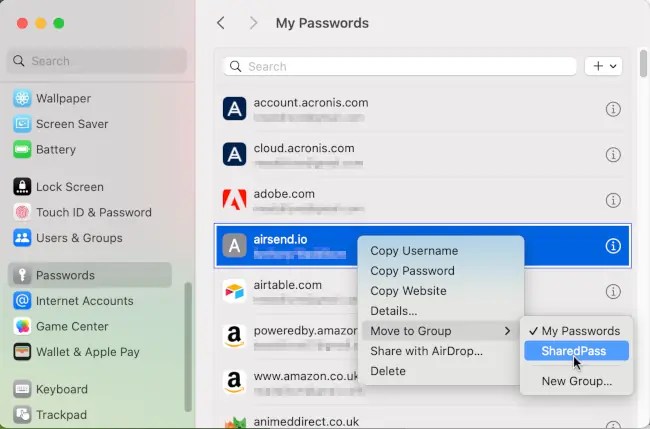
Suppose you want to share more passwords. Ctrl+click an existing password in your personal list and select Move to Group. The options on the menu are My Passwords (your private ones), and then there is a list of shared groups. Select the group to move the password to.
